WordPress localhost refers to a WordPress setup that operates on a computer’s local resources. It is commonly utilized for development and testing purposes, reducing the necessity for a web hosting service and minimizing the risk of affecting the live site. This article will outline how to install WordPress on localhost in six simple steps, using the XAMPP software, which is free and compatible with various operating systems. First, we will discuss how a WordPress localhost version functions and the different advantages of having a locally hosted WordPress site.
Why Install WordPress on Localhost
When setting up the WordPress CMS on a local machine, the entire site operates within a localhost environment. This setup connects the website to the local device using the loopback address network, rather than accessing the internet, which is why it’s referred to as “local.”
A localhost WordPress site enables web developers and designers to test features prior to deploying them on a live site. Consequently, any bugs can be addressed immediately without impacting the user experience.
Additionally, individuals interested in learning web development can take advantage of this version of WordPress. You can replicate a live site on your computer and utilize it for various testing purposes without the need to purchase a hosting plan or domain.
How to Install WordPress on Localhost in 6 Steps
There are several local server software choices for setting up a WordPress site locally. In this detailed guide, we will utilize XAMPP, which is the most widely used cross-platform web server for PHP development.
1. Download XAMPP
Go to the official Apache Friends website and download the correct XAMPP software version based on your operating system.
2. Install and Run XAMPP on Your Computer
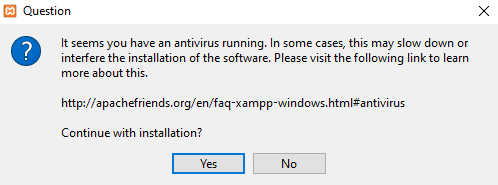
Execute the XAMPP installer and adhere to the installation guidelines while using the default options. If a notification appears suggesting that your antivirus software could interfere with the installation, click Yes to proceed.
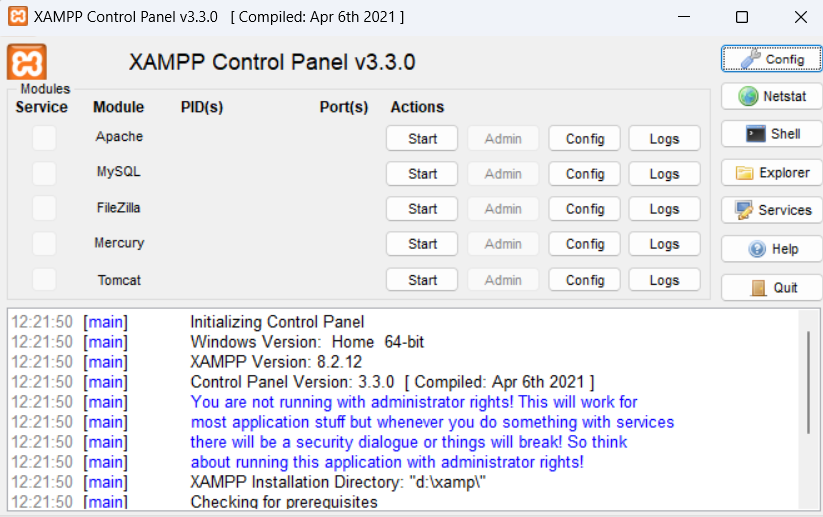
Once you have installed XAMPP, launch the application and set up the environment. In the XAMPP control panel, activate the Apache and MySQL modules to carry out the WordPress installation on localhost.
If you’re running on the Windows operating system, there’s a chance you might encounter the localhost refused to connect error. Disabling your firewall temporarily or stopping the program that uses port 80 should resolve this issue.
3. Download WordPress
After the server is operational, the subsequent step is to install WordPress. First, download the most recent version of WordPress and extract the ZIP file. Then, go to your XAMPP directory on the C drive (C:\xampp) and find the htdocs folder. Place the extracted WordPress files in this folder. It is advisable to rename the new folder to reflect your website’s name, which will facilitate web development on the XAMPP server.
Return to your XAMPP control panel and click the Admin button for the MySQL module to open phpMyAdmin, which is a tool for managing MySQL and MariaDB databases. This will assist you in creating a local MySQL database for your new website. Navigate to the Databases tab, input the desired database name in the Create database section, select Collation from the dropdown menu, and then click the Create button. Your newly created MySQL database should now be visible in the left sidebar of the webpage.

5. Install WordPress on Localhost
Complete the installation of WordPress locally by navigating to http://localhost/foldername in your web browser. Remember to replace the “foldername” placeholder with the actual folder name you selected in the previous step.
WordPress needs specific information to set up the local site. Please provide the following database details:
– Database name ‒ the name of the database you created in phpMyAdmin.
– Username ‒ use “root” as the default username.
– Password ‒ leave the MySQL database password field empty.
– Database host ‒ keep it as “localhost.”
– Table prefix ‒ retain the default “wp_.”
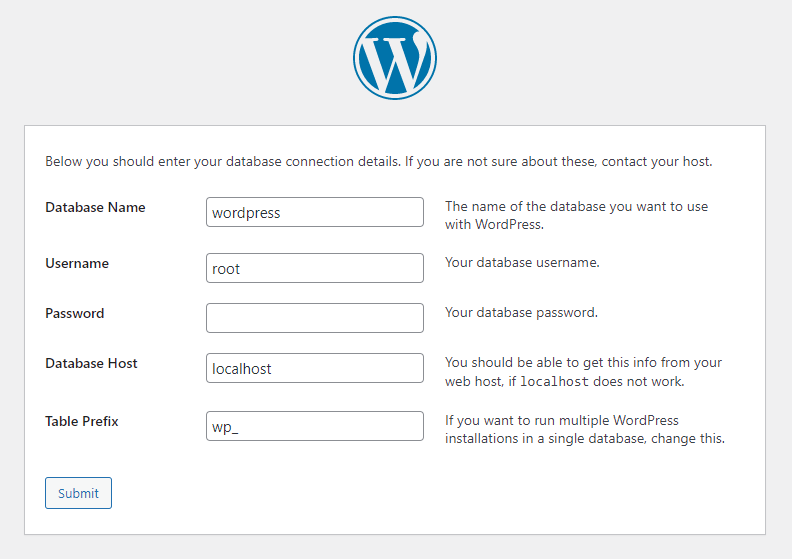
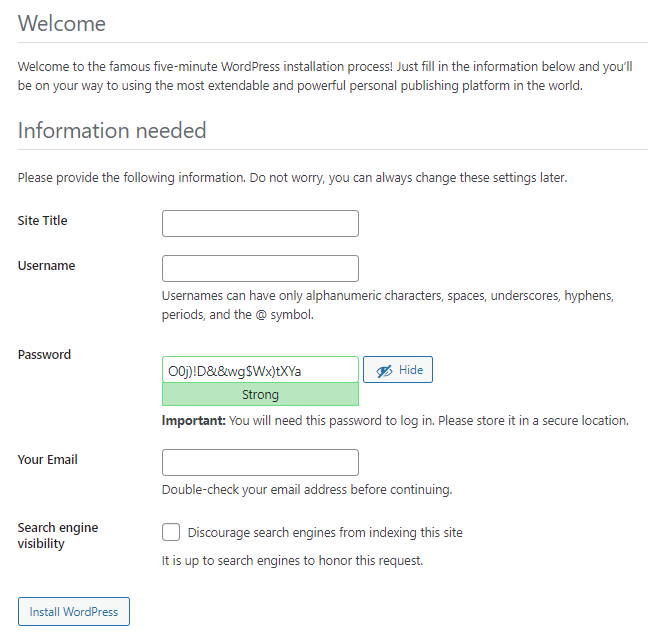
When finished, click Submit -> Proceed with the installation. Provide the required details, such as the site name and login information, then press the Install WordPress button.
6. Check the Local Site You Built
Your local test site is all set up. Navigate to http://localhost/foldername/wp-admin and enter the login details you established earlier to enter the WordPress dashboard.
Conclusion
To run a WordPress installation, you need a hosting plan and a domain name. However, if your goal is just to test or learn, you can install the CMS on your local machine and keep all the data stored locally, which should suffice for your needs. Here’s a summary of the steps to install WordPress on a local environment:
- Download XAMPP.
- Install XAMPP on your computer.
- Get the latest version of WordPress.
- Create a local database using phpMyAdmin.
- Install WordPress on your local server.
- Access the local test site through your browser.
Feel free to leave a comment below if you have any questions. Best of luck!
